Beef Szechwan

Oooo. Fancy sounding! I always can hear Ann-Margret from Grumpy Old Men saying “Good. I’m making sessss-shwan.” in her seductive voice whenever I think of this recipe.

I’ve always wanted to try Beef Szechwan, but have been too intimidated to try it in restaurants because it’s typically a really spicy dish, and if you know anything about me, me and spice and heat do not get along very well. I can handle a little zing, but I don’t like my taste buds roasted off. Tasting my food is usually a highlight.

But I digress.

I found this recipe, once again, in my trusty Better Homes & Gardens cookbook. You can also see the recipe here. It’s amazingly rich and original without being ridiculously fatty or unhealthy. It comes highly recommended, I promise! Also…incredibly easy to make.

Beef Szechwan

Ingredients:

  • 12 ounces boneless beef top round steak or sirloin steak (I used a full pound)
  • 3 tbsp dry sherry or orange juice (I used orange juice)
  • 3 tbsp soy sauce
  • 2 tbsp water
  • 2 tbsp bottled hoisin sauce
  • 1 tbsp grated fresh ginger or 1/2 tsp ground ginger (I used ground)
  • 2 tsp cornstarch
  • 1 tsp sugar
  • 2 cloves garlic, minced
  • 1/4 to 1/2 tsp crushed red pepper (optional – I didn’t use any!)
  • 1 tbsp cooking oil
  • 1 cup thinly bias-sliced carrot
  • 1 14-oz can whole baby corn, drained (I couldn’t find any, so I just used a regular can of “adult” corn.)
  • 1 red sweet pepper, cut into 1-inch pieces
  • 2 cups hot cooked rice (I used basmati brown – my favorite!)
  • thinly sliced green onion (optional)
Directions:
  1. If desired, partially freeze beef for easier slicing. Trim fat from meat. Thinly slice meat across the grain into bite-size strips, set aside.
  2. For sauce, in a small bowl stir together sherry/orange juice, soy sauce, water, hoisin sauce, ginger, cornstarch, sugar, garlic, and, if desired, crushed red pepper; set aside.
  3. In a wok or large skillet heat oil over medium-high heat. (Add more oil, if necessary, during cooking.) Add carrot; cook and stir in hot oil for 2 minutes. Add corn and sweet pepper. Cook and stir for 1 to 2 minutes more or until vegetables are crisp-tender. Remove from wok.
  4. Add beef strips to hot wok. Cook and stir for 2 to 3 minutes or until meat is slightly pink in center. Push meat from center of wok.
  5. Stir sauce. Add sauce to center of wok. Cook and stir until thickened and bubbly. Return cooked vegetables to wok; stir to coat all ingredients with sauce. Cook and stir for 1 to 2 minutes more or until heated through. Serve immediately with rice. If desired, sprinkle with green onion.
Once again, I had my handsome assistant helping me out. Prepping dinner goes a lot faster when you’ve got someone doing the chopping for you!
Do a little stir-fryin’…

Remove the veggies, add the beef…

Sauté until pink inside…

Mix it all together, serve it over rice, and you come up with a beautiful, delicious dinner!

My mouth is watering just thinking about this.

And in my handsome assistant’s own words, “Man…this beef stuff is REALLY good re-heated!!”

Who can argue with leftovers like that?

Enjoy!

Finger-Lickin’ Fajitas

I promise that my lack of blogging lately doesn’t mean I haven’t been cooking. In fact, quite a few delicious and easy, “I’m so tired I can’t barely move” recipes have been discovered in the past few weeks. So you working ladies and moms…celebrate!

Here’s one that I made recently where I just sat through the entire meal making contented grunting noises like a pig. I’d also like to note that I brought leftovers of it to work today and I had at least 4 people comment on how delicious it smelled.

I’d like to introduce you to the newest member of my permanent meal rotation, Weeknight Skillet Fajitas, from my lovely new America’s Test Kitchen cookbook. I couldn’t find a link, so let’s be clear: I’m not talented enough to come up with this recipe on my own, and I’m currently in love with America’s Test Kitchen for including it in their Family Cookbook, which you can purchase here.

Okay okay  I’m done.

Weeknight Skillet Fajitas

Ingredients:

  • 1 (1 1/2-pound) flank steak, trimmed
  • salt and pepper
  • 2 tbsp fresh lime juice
  • 2 red bell peppers, stemmed, seeded, and sliced thin
  • 1 red onion, halved and sliced thin
  • 2 tbsp water
  • 1 tsp chili powder
  • 1 tsp Tabasco (I definitely only just sprinkled it on there. We all know I’m a weenie.)
  • 1/2 tsp cumin
  • 12 (6-inch) flour tortillas
Directions:
  1. Pat the steak dry with paper towels, then season with salt and pepper. Heat 1 tbsp of the oil in a 12-inch skillet over medium-high heat until just smoking. Brown the steak on the first side, about 5 minutes.
  2. Flip the steak over and continue to cook to the desired doneness, 3 to 6 minutes. Transfer to a large plate and drizzle with the lime juice. Tent with foil and let rest for 10 minutes.
  3. Meanwhile, add the remaining 1 tbsp oil to the skillet and return to medium-high heat until shimmering. Add the bell peppers, onion, water, chili powder, Tabasco, cumin, and 1/2 tsp salt. Cook, scraping up any browned bits, until the onion is softened, about 5 minutes. Transfer to a serving bowl.
  4. Stack tortillas on a plate and cover with plastic wrap. Heat in microwave until soft and hot, 30 seconds to 2 minutes.
  5. Slice the steak very thin across the grain. Arrange the beef on a platter and serve with warm tortillas, vegetables, and any desired accompaniments. Suggested accompaniments: salsa, sour cream, chopped avocado, shredded cheese, shredded lettuce, and lime wedges.
Simple. Now, because of the whole, “too-tired-to-move” thing, I didn’t really get any photos of the process, even with my fancy shmancy new camera. However, I got a few shots of the peppers and onions, because I think they’re pretty.

And now for photos of the tasty final product!

Mmm. (More pig-grunting noises.)

Ahem. Excuse me.

So, that’s that. I hope you run home and make these, because they’re fantastic, and easy on sensitive tums like mine.

Happy Wednesday!

My Go-To Chocolate Chip Cookies

My husband is a HUGE chocolate chip cookie fan. In fact, he is a chocolate chip cookie snob if there is such a thing. And if the cookie happens to have M&Ms in it too… well, then it’s all over. So, in our year and a half of marriage, I have tried a wide assortment of cookie recipes in search of one that measured up to his “upper echelon” standards. And I think I have finally found it. Crisp on the outside, chewy on the inside. The best part? It’s super easy and doesn’t need any fancy ingredients! Have I died and gone to heaven?!

So, if you are looking for a reliably good and simple-yet-delicious chocolate chip cookie recipe, here you go!

Ingredients

  • 1 1/4 cups brown sugar, firmly packed
  • 3/4 cup butter flavored shortening
  • 2 tablespoons milk
  • 1 tablespoon vanilla extract
  • 1 large egg
  • 1 3/4 cups all purpose flour
  • 1 teaspoon salt
  • 3/4 teaspoon baking soda
  • 3/4 cup semi-sweet chocolate chips
  • 3/4 cups milk chocolate chips

Directions

Heat oven to 375° F.

Combine brown sugar, shortening, milk and vanilla in a large bowl. Beat at medium speed with an electric mixer until light and fluffy. Beat egg into creamed mixture.

Combine flour, salt and baking soda. Gradually add to creamed mixture and mix until just blended. Stir in chocolate chips.

Drop by round tablespoonfuls of dough 3 inches apart onto an ungreased cookie sheet.

Bake for 8-10 minutes for chewy cookies or 11-13 minutes for crispy cookies. Cool for a few minutes on the cookie sheet and then remove to a cooling rack to cool completely.

Serve with a tall glass of milk and a lot of smiles. Enjoy!

Tips and Alterations

  • I like to use the butter flavored shortening sticks for easy measuring. Instead of 3/4 cup, use 3/4 a stick. Super simple and less messy than trying to measure shortening.
  • I always add more chocolate chips than the recipe calls for. I usually just eyeball it till it looks good. You can never have too much chocolate, right?
  • Ultimate Chocolate Chip M&M cookies: use 1/2 cup milk chocolate chips, 1/2 cup dark chocolate chips and 1 cup mini M&Ms. (You can usually find the mini M&Ms in the candy section of your grocery store.)
  • Triple Chip Cookies: use 2/3 cup milk chocolate chips, 2/3 cup dark chocolate chips, and 2/3 cup white chocolate chips.
  • Chocolate Chip Reese Pieces cookies: I recently found mini Reese Pieces in our grocery store. So fun! I used the same ratio as the M&M variation, but used the mini Reese pieces instead. YUM! You could also use the regular sized Reese pieces candies.
  • This recipe doubles nicely. So, if you are making for lots of people, just double up.
  • This recipe also freezes very nicely. Make logs of cookie dough, roll up in wax paper and twist the ends. Then roll in aluminum foil and twist the ends so that it resembles a tootsie roll. Use a marker to write the type of cookie and baking temperature/time on the outside of the foil for easy remembrance. Then just plop in your freezer. This makes it easy to have fresh baked cookies any time. Also great for gifts.

And now for a few pictures of the cookie dough and final product.

Two types of cookie dough - Reese Pieces Chocolate Chip on the left and M&M Chocolate Chip on the right.

M&M cookies ready to bake.

Reese Pieces cookies ready to bake.

The final products. Delicious!

This is an example of what a cookie dough log looks like. These are some cookie dough logs that I made for this past Christmas. Putting the cookie information on the outside of the log makes for easy baking in the future.

Bon appetit!

-GG

Scampi!

I usually like to do a detailed Thursday dinner feature with lots of photos, and I even had one of those all prepared for you. However, this particular recipe snuck up on me last night for dinner and was so delicious that I managed to get a few shots and MUST share it with you.

For my friends that like restaurant-quality food but never have the time to make it, this recipe is absolutely for you because it takes virtually no effort. And, if it couldn’t get any better, it’s sensitive-tummy approved – a rich flavor without the ingredients that get us all in a fuss.

So, without further ado…

Shrimp Scampi with Spinach (Recipe from Real Simple maagzine…you can find it here.)

Ingredients:

  • 1 cup long-grain white rice (I used brown basmati, since that’s my favorite)
  • 2 tbsp unsalted butter (I used salted, and cut back on the salt in the recipe)
  • 2 cloves garlic, sliced (I just used minced, and was pretty generous)
  • 1 cup dry white wine, such as Sauvignon Blanc (I used the kind that you get in the cooking section of the grocery store since it’s significantly cheaper)
  • 1 28-oz can diced tomatoes, drained
  • kosher salt and pepper
  • 1 pound medium raw shrimp, peeled and deveined (I was generous and probably did more like 1.5 lbs – up to you!)
  • 1 5-oz package baby spinach
  • 1 tbsp fresh tarragon, chopped (I’m sure this would have been a great addition, but I didn’t feel like spending money on fresh tarragon when it was just a topping, so I omitted this part.)
Directions:
1. Cook the rice according to the package directions.
2. Melt the butter in a large saucepan over medium-heat. Add the garlic and cook for 1 minute. Add the wine, tomatoes, 1/4 tsp salt (I just sprinkled in a bit since I had used salted butter), and 1/4 tsp pepper. Simmer for 3 minutes, until the sauce has thickened slightly.
3. Stir in the shrimp and simmer until cooked through, about 4 minutes. Add the spinach and stir until wilted.
4. Spoon the rice into a serving dish or divide among individual plates. Top with the scampi and sprinkle with the tarragon.

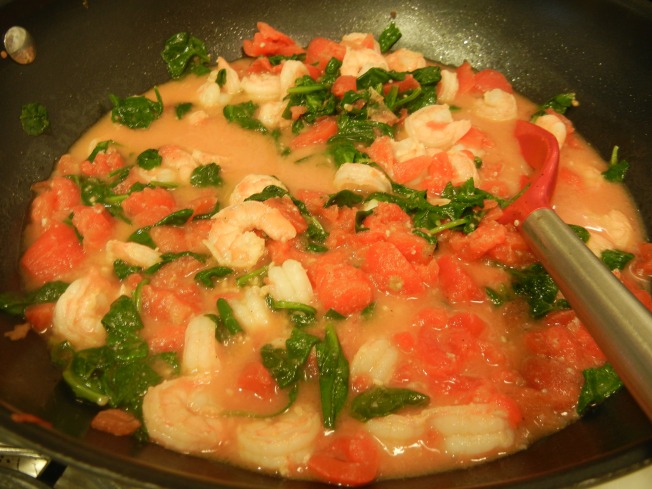
There you go! So simple. Here’s what mine looked like.
How pretty is that?
Oh man. I’ve never been so excited for lunch leftovers. Even Scott, who is not a huge shrimp fan, thought this recipe was especially tasty.

Aside from the changes I already mentioned, the only other thing I did was add just a couple shakes of Parmesan cheese and a little garlic powder, but nothing of any major significance. Very straightforward, very easy, and very quick. And tasty enough to impress any guests you might have over for dinner. It makes four healthy-sized portions.

Happy Thursday! Now go home and make this recipe. Your taste buds will thank you!

Chicken Pancit

That’s right. You read that right. It’s not a typo. Chicken Pancit. Don’t even begin to ask me how to pronounce it. If you have this valuable pronunciation information, please share in the comments section so I’m not wandering around sounding ignorant. Thanks!

I came across this recipe because I had gotten a good deal on rice noodles at the co-op I visit a couple times a year and I was searching for recipes that call for rice noodles so I could finally use them up. These recipes, come to find out, aren’t hugely common!

I found this recipe on AllRecipes.com, and you can click here for an easy, printable version.

Rice noodles are just what they sound like – noodles made from rice flour instead of wheat flour. From what I understand, this is a recipe friendly for my friend with celiac’s disease (can’t eat gluten), as there is no wheat or gluten in rice noodles.

This recipe turned out to be a gem, and was incredibly simple.

Chicken Pancit

Ingredients:

  • 1 -12oz package dried rice noodles (I used a 10-oz package of the super thin ones and that was plenty!)
  • 1 tsp vegetable oil
  • 1 onion, finely diced
  • 3 cloves garlic, minced
  • 2 cups diced cooked chicken breast meat
  • 1 small head green cabbage, thinly sliced
  • 4 carrots, thinly sliced
  • 1/4 cup soy sauce
  • 2 lemons – cut into wedges, for garnish
Directions:
  1. Place the rice noodles in a large bowl, and cover with warm water. When soft, drain, and set aside.
  2. Heat oil in a wok or large skillet over medium heat. Sauté onion and garlic until soft. Stir in chicken cabbage, carrots and soy sauce. Cook until cabbage begins to soften. Toss in noodles, and cook until heated through, stirring constantly. Transfer pancit to a serving dish and garnish with quartered lemons.
Now I know you’re dying to see what this looks like. So I won’t make you wait any longer. I’m a nice person aren’t I?
The ingredients…and what rice noodles look like when they’re soaking. Tasty! And for my friends who like to do gross games at Halloween with peeled grapes as eyeballs and such, I highly recommend trying out rice noodles next year. The texture while they’re soaking is enough to make you squirm a little bit.
Time to stir-fry it up. (Cue rock’n’roll cooking music. I may or may not have a tendency to dance around in my kitchen to Travelin’ Band by Creedence Clearwater Revival. No video-taping allowed.)
Look at my handsome assistant, adding the soy sauce!
Already lookin’ and smellin’ tasty…and now for the final product!
Hellooooo chicken pancit!

We loved this dish as a whole and it will definitely be going on our repeat list. It was simple to do when I got home from work, and it’s incredibly light and fresh so you don’t feel totally full when you’re done. A welcome change from the heavy, dense winter foods we’ve been eating.
A remarkable thing too: I LOVED this recipe. And I hate cooked cabbage. Usually, I have to leave the room while it’s cooking, otherwise I get sick to my stomach. I have no problem with it raw, like in cole slaw and other salads, but the second it hits a pan, I’m a goner. However, this recipe pleasantly surprised me. Not only was it good the night we made it, but it was still good after I re-heated it for lunch – which I was worried about. And, cabbage is very healthy for you – bonus! 

I’ve been leaning a lot towards Asian food lately in my cooking, since it tends to be a lot easier on my extremely sensitive stomach, so prepare yourself for more Asian yumminess headed your way soon!

Spring Cup-ity Cakes

With Easter right around the corner, here are a few photos of some cupcakes I recently helped make for a spring fundraiser. May they inspire your sense of baking to break out the light spring flavors and colors. Enjoy!

Coconut cake with coconut buttercream frosting, toasted coconut, and mini Cadbury chocolate eggs.

Carrot cake with cream cheese frosting and a dusting of cinnamon.

Strawberry cake with strawberry buttercream.

Dark chocolate cake with strawberry buttercream. Like an upside down chocolate covered strawberry.

Dark chocolate cake with peanut butter buttercream.

Yellow cake with chocolate mousse.

-GG

Slow-Cooker Pulled-Pork Tacos

I am happy to report that the sun has finally come out in Baltimore (although it looks like it won’t be for longer than 24-hours…grumble…), but for the time being, we’re going to celebrate the sunshine!

To do so, this Thursday’s dinner feature is one that will be perfect for future sunshine-y days when the last thing you want to do is be stuck inside over your stove. This new twist on tacos is awesome to plate up and take outside for a nice dinner al-fresco, and bonus – no heating your house up!

So here’s there recipe, and stay with me on this because I know you might quirk an eyebrow at some of the ingredients. I promise. It’s delicious. Would I steer you wrong?

This recipe comes from Real Simple Magazine…online! You can view it here.

Slow-Cooker Pulled-Pork Tacos

Ingredients:

  • 2 cups store-bought salsa, plus more for serving
  • 2 tbsp chili powder
  • 2 tbsp dried oregano
  • 2 tbsp unsweetened cocoa powder
  • kosher salt
  • 1 – 2.5 lb boneless pork butt or shoulder, trimmed of excess fat
  • 18 corn tortillas (we prefer flour!)
  • 1/2 cups fresh cilantro sprigs
  • 3/4 cup sour cream
  • 1 lime, cut into wedges

Directions:

  1. In a 4- to 6- quart slow cooker, combine the salsa, chili powder, oregano, cocoa, and 1 tsp salt. Add the pork and turn to coat.
  2. Cook, covered, until the meat is tender and pulls apart easily, on high for 4 to 5 hours or on low for 7 to 8 hours.
  3. Twenty minutes before serving, heat oven to 350 degrees.
  4. Stack the tortillas, wrap them in foil, and bake until warm, about 15 minutes.
  5. Meanwhile, using 2 forks, shred the pork and stir into the cooking liquid. Serve with the tortillas, cilantro, sour cream, lime, and extra salsa.

And there you go. Now…how I do it!

I’m going to warn you right now. I’m not posting ANY pictures of what this looks like until after it’s cooked and pulled. When you combine salsa and cocoa powder, it looks a little…gross. A lot bit gross. In fact, if you have kids that LOVE gross things, this will be something excellent to let them help you with. However if you have picky eaters, don’t even let them near this until it’s done. You’ll be able to see how pretty it turns out, so have no fear!

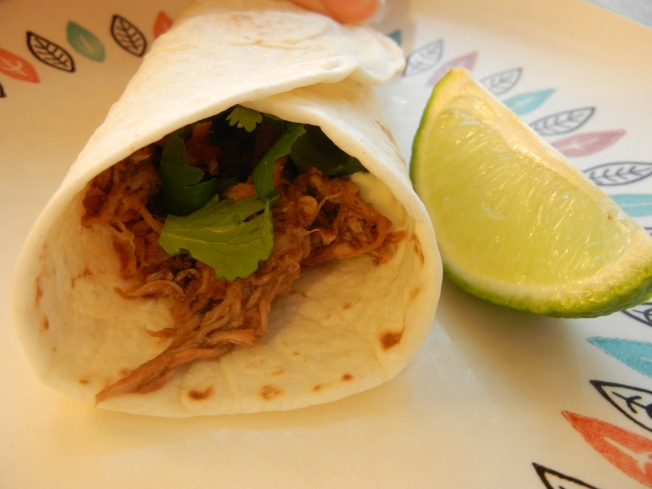
The ingredients! And now…the pretty results.

Yum yum. Now, since there are just two of us, I skipped the whole “heating the tortillas in the oven” thing. I just take 4 tortillas which is about what we usually eat, cover them with a damp paper towel, and microwave them for 30 seconds.

And now…are you ready for how pretty these tacos are? Check it out.

I hope your mouth is watering!

Tricks of the Trade:

  • For my fellow couples or people with less than 4 people at home. This makes a LOT of pulled pork. The recipe says it serves six…but I’d say maybe more than that, depending on how much you eat. However! Pulled pork freezes well – so we ate it for a night, then froze the rest and will have tacos again soon.
  • Like I said above, Scott and I prefer flour tortillas, and they work out just fine.
  • All my meat is usually frozen since I only buy it when it’s on sale, so my pork roast wasn’t quite completely thawed when I was ready to put it in the crock pot. Thus, the beauty of the crock pot! Since I was going to be at work longer than 8 hours anyway, I put it in, partially frozen, and cooked it on low for more like 10 hours and it still turned out just wonderfully.
  • Because I’m scared of anything spicy, I cut the chili powder back to a little more than a tablespoon. However, I think next time I would do the full amount, because chili powder really doesn’t add heat as much as it adds a deep, smoky flavor. For those of you who want your tacos to be spicy, I recommend using a hot salsa. We used mild, because we’re weenies.
  • I KNOW it’s weird that there is cocoa powder in this recipe, but I promise, it’s awesome! It adds such a richness to the tacos that isn’t there when you use the usual seasoning packets. It’s not like a chocolate taco. (Although…hmm. No. No. That would be bad.)

So there you have it! Easy, delicious, and not to mention light and fresh for my fellow friends with sensitive tummies.

Happy Thursday!

Cheese Ravioli with Three Pepper Topping

Looking for a nice twist to pasta? Try out this unique Cheese Ravioli recipe. Complete with a fun chicken cream sauce twist and some healthy veggies, this one is definitely a nice alternative to standard alfredo or tomato sauce recipes.

(Recipe beginnings compliments of www.allrecipes.com.)

Ingredients

  • 1 pound cheese ravioli (or tortellini)
  • 3 tablespoons olive oil
  • 1 small onion, diced
  • 1 green bell pepper, thinly sliced
  • 1/2 red bell pepper, thinly sliced
  • 1/2 yellow bell pepper, thinly sliced
  • 2 cups chicken broth, divided
  • Splash of heavy cream (about 1/3 cup)
  • 1/4-1/2 cup shredded parmesan cheese
  • 1/4 teaspoon crushed red pepper flakes
  • Salt and pepper to taste

Directions:

  1. Bring a large pot of lightly salted water to a boil. Cook ravioli in boiling water for 8 to 10 minutes, or until done; drain.
  2. Heat olive oil in large skillet over medium heat. Saute onion and bell peppers until tender. Add one cup of the broth, season with pepper flakes, salt, and pepper. Simmer 5 minutes. Stir in remaining broth and cook until most of the broth has evaporated. Add splash of cream and parmesan cheese. Cook an additional couple minutes until cheese is melted and sauce is thoroughly heated.
  3. Spoon pepper mixture over ravioli. Top with additional parmesan cheese if desired.

The final product... Yum!

Pretty, delicious, and easy to make. What more could you want?!

Tips and Alterations:

  • If you view the original recipe, you will see that the heavy cream and parmesan cheese are not called for. However, upon the advice of other reviewers, I added these two extra ingredients and WHOA! Amazing! You could substitute half-n-half or your favorite type of milk instead of heavy cream to cut the richness down a bit.
  • I used cheese tortellini instead of ravioli. More or less the same, but it’s what I happened to have on hand. Any type of filled pasta will work nicely.
  • Feel free to add some extra seasoning to this to suit your taste. I added some garlic, parsley, oregano, and basil to mine.
  • I did not use all the chicken broth that was called for (also per other reviewers advice). I probably only ended up using about 1 1/2 cups. It was still plenty of sauce and took less time to cook down than 2 full cups. If you want to thicken up your sauce a bit, add about a tablespoon of corn starch to the cream before adding to the sauce.
  • I used red, yellow, and orange peppers because it was cheaper to buy them as a set than to buy the individual peppers. But green would have been good too.

This recipe is relatively simple, has great visual appeal, and is just a downright delicious variation on standard pasta dishes. Also, it can easily be made in 30 minutes or less. Perfect for a quick meal for a couple or a group as you can easily increase the amounts.  Give it a try and your tummies will thank you!

Bon appetit!

-GG

Beef Roulade

Today’s Thursday Dinner Feature comes from my KitchenAid Best-Loved Recipes cookbook. It’s one of those ones that I just keep making, because it’s sooo good. And not to mention a little bit impressive.

Just say “Beef Roulade” and people will think you’re gourmet.

Except what they don’t know is that it’s just fancy meatloaf. Shh. Don’t tell. It’ll be our little secret.

Also, the recipe as written makes 14 (1-inch) servings. Otherwise known as a huge freaking meatloaf. I roughly halved it when I made it and it turned out just fine.

Beef Roulade

Ingredients:

  • 1 1/2 lbs ground beef (3/4 lb)
  • 1 1/2 cups fresh bread crumbs (3/4 cup)
  • 2 eggs (1 egg)
  • 3/4 cup milk (6 tbsp)
  • 1/2 cup ketchup (1/4 cup)
  • 1/4 cup Parmesan cheese (1/8 cup or 2 tbsp)
  • 1/4 cup chopped fresh parsley (1/8 cup or 2 tbsp)
  • 1 1/2 tsp dried oregano (3/4 tsp)
  • 1/8 tsp garlic powder (eyeball it…or still use 1/8. Because I love garlic.)
  • 1/2 tsp salt (1/4 tsp)
  • 1/4 tsp black pepper (1/8 tsp)
  • 2 packages, 10 oz each, frozen chopped spinach, thawed (1 pkg)
  • 1 cup ricotta cheese (1/2 cup)

Directions:

1. Place ground beef, bread crumbs, eggs, milk, ketchup, Parmesan cheese, parsley, oregano, garlic powder, salt and pepper in large bowl. Mix thoroughly, but gently, with hands until well combined. Turn out onto waxed paper and shape into 10×14-inch rectangle. (I kind of just put mine into a randomly sized rectangle. It worked out fine.)

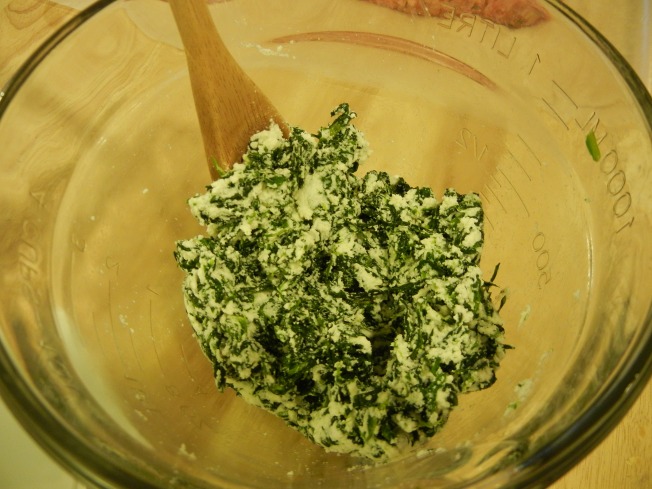
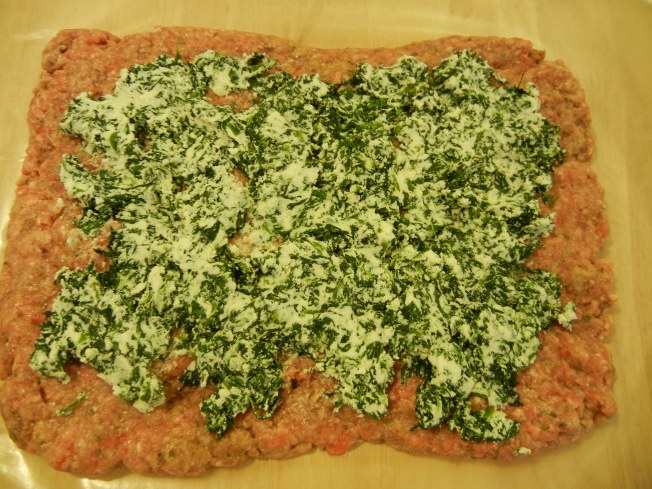
2. Place spinach in towel and wring until very dry. Place spinach and ricotta cheese in bowl of electric stand mixer. Turn to low and mix 1 minute. (We’ll be honest – the only  reason it probably says with a stand mixer is because this is a KitchenAid cookbook. I mixed mine by hand with little or no difficulty and it was worth not dirtying another bowl. Your choice!) Spread spinach mixture on top of meat mixture. Roll up, beginning at longest side. Press edges and ends of roll together to seal.

3. Place on greased baking sheet, seam-side down. Bake at 350 degrees for 1 hour. Serve immediately.

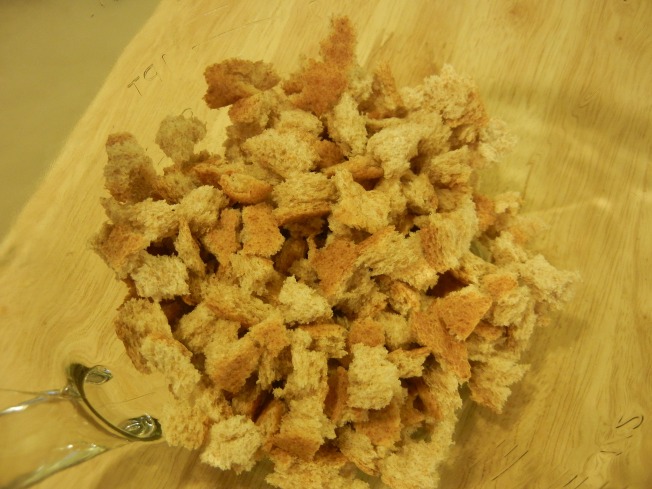
So! Here’s how it looked when I made it. I used the two ends from our most recent loaf of bread to make the bread crumbs, since Scott and I are embarrassingly picky about our bread and the ends just don’t cut it.

Combine all the ingredients and mix’em’up. Admittedly, this is the hardest step for me. Why? Because I absolutely cannot stand touching ground beef. It’s a mild phobia of mine. However, I do love to eat ground beef, and I’m working on getting better at it. Mixing meatloaf mix with my bare hands is pretty good proof I think.

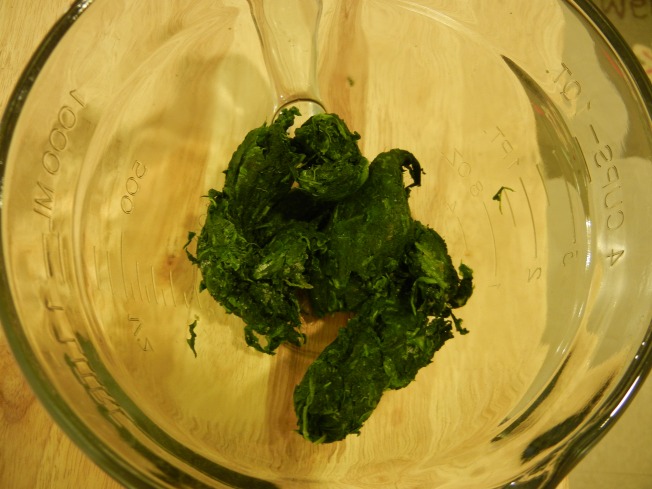
Wring out your spinach well. If you need a little inspiration, think of Popeye and the magical spinach powers that will help you wring out all that moisture.

Shape up your loaf, mix up your nice dry spinach with ricotta cheese, and spread it out. Since the spinach mixture is fairly stiff, I plopped it down in little balls all over the loaf and spread it out very gently with my fingers so I didn’t make any holes in the meatloaf.

Do NOT forget to use wax paper!

If you’ve ever rolled sushi, the next step is very similar. Use the wax paper to help you turn over the edge and gently roll it up, applying just a small amount of pressure.

Meatloaf! And now…you bake the beast. And it will come out looking golden and bubbly and your house will smell fantastic. And please note. See how large this meatloaf is? This is HALF a recipe. So only make the full recipe if you’re planning on feeding an army.

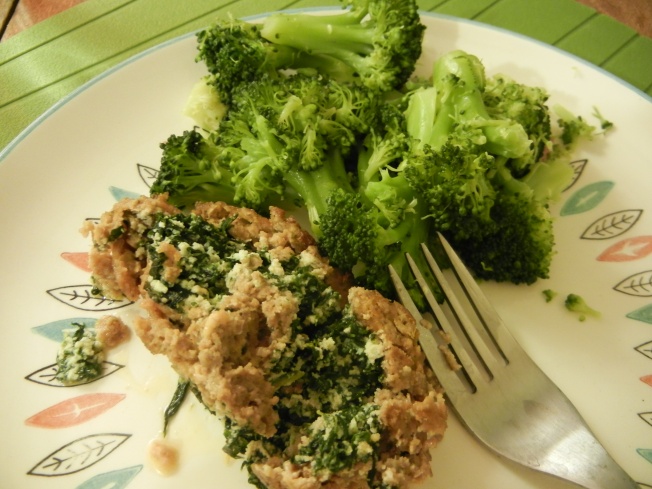
I wasn’t feeling too original with sides, so I just steamed up some broccoli, and skipped a starch altogether. There’s bread in the meatloaf right?

Mmm. Something tells me I’ll be making this again. Just looking at the photos is making me hungry.

Now go impress your friends and family with this awesome, easy recipe. They’ll love it – and it’s a sneaky way to get some vegetables in!

Happy Thursday!

Herb Gardening for the City Girl

Since life has chosen to put me in the city for a little while, I’ve been learning to adapt my gardening desires to the indoors. While a lot of things still aren’t really possible (tomatoes, zucchini, carrots, cucumbers, beans….SIGH), the one thing I am able to pull off is an herb garden.

I’ve been doing this since we moved in, and I have a parsley plant and an oregano plant that don’t ever seem to die. So I just keep thinning them out and they have been my long time friends and kitchen contributors. The rest of my herb friends I have to re-start every year.

I highly recommend having a little herb garden, if not solely for the purpose of the money you save by not having to buy fresh basil or cilantro at the grocery store for a recipe. Especially if you start yours from seed. $1 per packet, for a whole season’s worth of herbs? Yes please. Although be warned – if your home doesn’t get a lot of natural sunlight, you may want to stick to the outdoors. Our windows face south and we get lots of light all day long, so our little plants love it.

So! I thought I’d document my progress this year. If you’re inspired to start your own, you can do so at any time since the indoors are a controlled environment – hurray for year-round fresh herbs!

I started mine from seed, which is so simple. Here’s my basic routine.

Spread some aquarium gravel on the bottom of your chosen pot, or rocks, if you have access. I’ve even read that you can use styrofoam peanuts, but haven’t been brave enough to try yet. The point is to make the bottom layer of your pot able to drain well.

Fill remainder of the pot with potting soil. Spread seeds according to package direction  -some seeds like to be spread further apart than others. Cover with thin layer of soil.

Then, you have to make a little greenhouse sort of situation. You can technically buy the little seed starting trays with lids and those work well but since I never wind up transplanting my seedlings to an outdoor garden, I just make my own little make-shift green house. See exhibit A.

I have some loose plastic bags over the various pots, which keeps the environment humid and warm. Spray the top of the soil daily with a spritzer bottle to make sure the environment stays moist but not soggy, otherwise your seeds will rot. The other important thing is to absolutely NOT put your little greenhouses in the sun. I learned this when I was little kid and mom was letting me start my own seeds. You will bake them. Like little pumpkin seeds.

It was tragic.

Keep them in a dimly lit, warm area. Lesson learned.

Then…just have patience! I’ll admit I get over-excited when I see these little guys poking their heads up for the first time. We all know I’m a geek, let’s just face the facts.

It takes different lengths of time for the various seeds to germinate. Since I planted chives, two pots of basil, and cilantro, the basil came up first, then the chives, and the cilantro is still working.

When your seedlings are about an inch tall, it’s time to thin them. Which always makes me a little bit sad, but our little friends need room to grow. The seed packets will tell you how far apart to thin them.

Let’s have a moment of silence for our little sprouts that didn’t make the cut. (Can you hear The Circle of Life playing in the background?)

Moving on. Now for more patience. I’ve removed my pots from their respective greenhouses and placed them near a window with direct sunlight. Since they’re not insulated anymore, it’s time to start watering them with a regular can as opposed to the spritzer, although some care should still be exercised in not drowning the poor little things. (Come on now, they just had to watch their friends get ripped out by their roots. Have some compassion.)

Here’s where we’re at now.

Trusty oregano and parsley saying a little “Howdy-doo” to the newcomers.

And we’re still waiting on Cilantro. He’s a slow learner.

Updates on herb gardening progress to come!