Santa Fe Chicken Casserole

Grace here…

Looking for a quick and delicious dinner idea? Check out this new recipe that I discovered – Santa Fe Chicken Casserole (compliments of Kraft Foods: www.kraftrecipes.com).

This recipe requires a few simple and easy to find ingredients. It’s also very quick to assemble and bake. Perfect for a quick and delicious dinner after a busy day of running about. I forgot to take pictures of the assembly process, but it is a fairly straight forward layering method. I think you all can figure it out.

Ingredients

  • 3 cups shredded, cooked chicken breast
  • 1 (15 oz.) can seasoned black beans, rinsed
  • 1 (14.5 oz.) can diced tomatoes, drained
  • 2 green onions, sliced
  • 1 tub Philadelphia Santa Fe Blend Cooking Cream
  • 3 flour tortilla (6-8 inch)
  • 3/4+ cup Mexican shredded cheese

Directions

Heat oven to 375° F.

Combine the first four ingredients in a large bowl. Add 3/4 cup cooking cream and mix lightly. Spoon 1/3 of the chicken mixture into a 9-inch pie plate. Top with one tortilla, half the remaining chicken mixture, and 1/4 cup shredded cheese. Cover with second flour tortilla, remaining chicken mixture, and 1/4 cup shredded cheese. Top with last tortilla. Cover with remaining cooking cream and enough shredded cheese to suit your preference.

Bake for 20 minutes or until heated thoroughly. Broil for a few additional minutes until cheese is golden brown and bubbly.

Serve with a side of tortilla chips & salsa, sour cream, Spanish rice, or other desired Mexican accompaniments.

And now for a few photos…

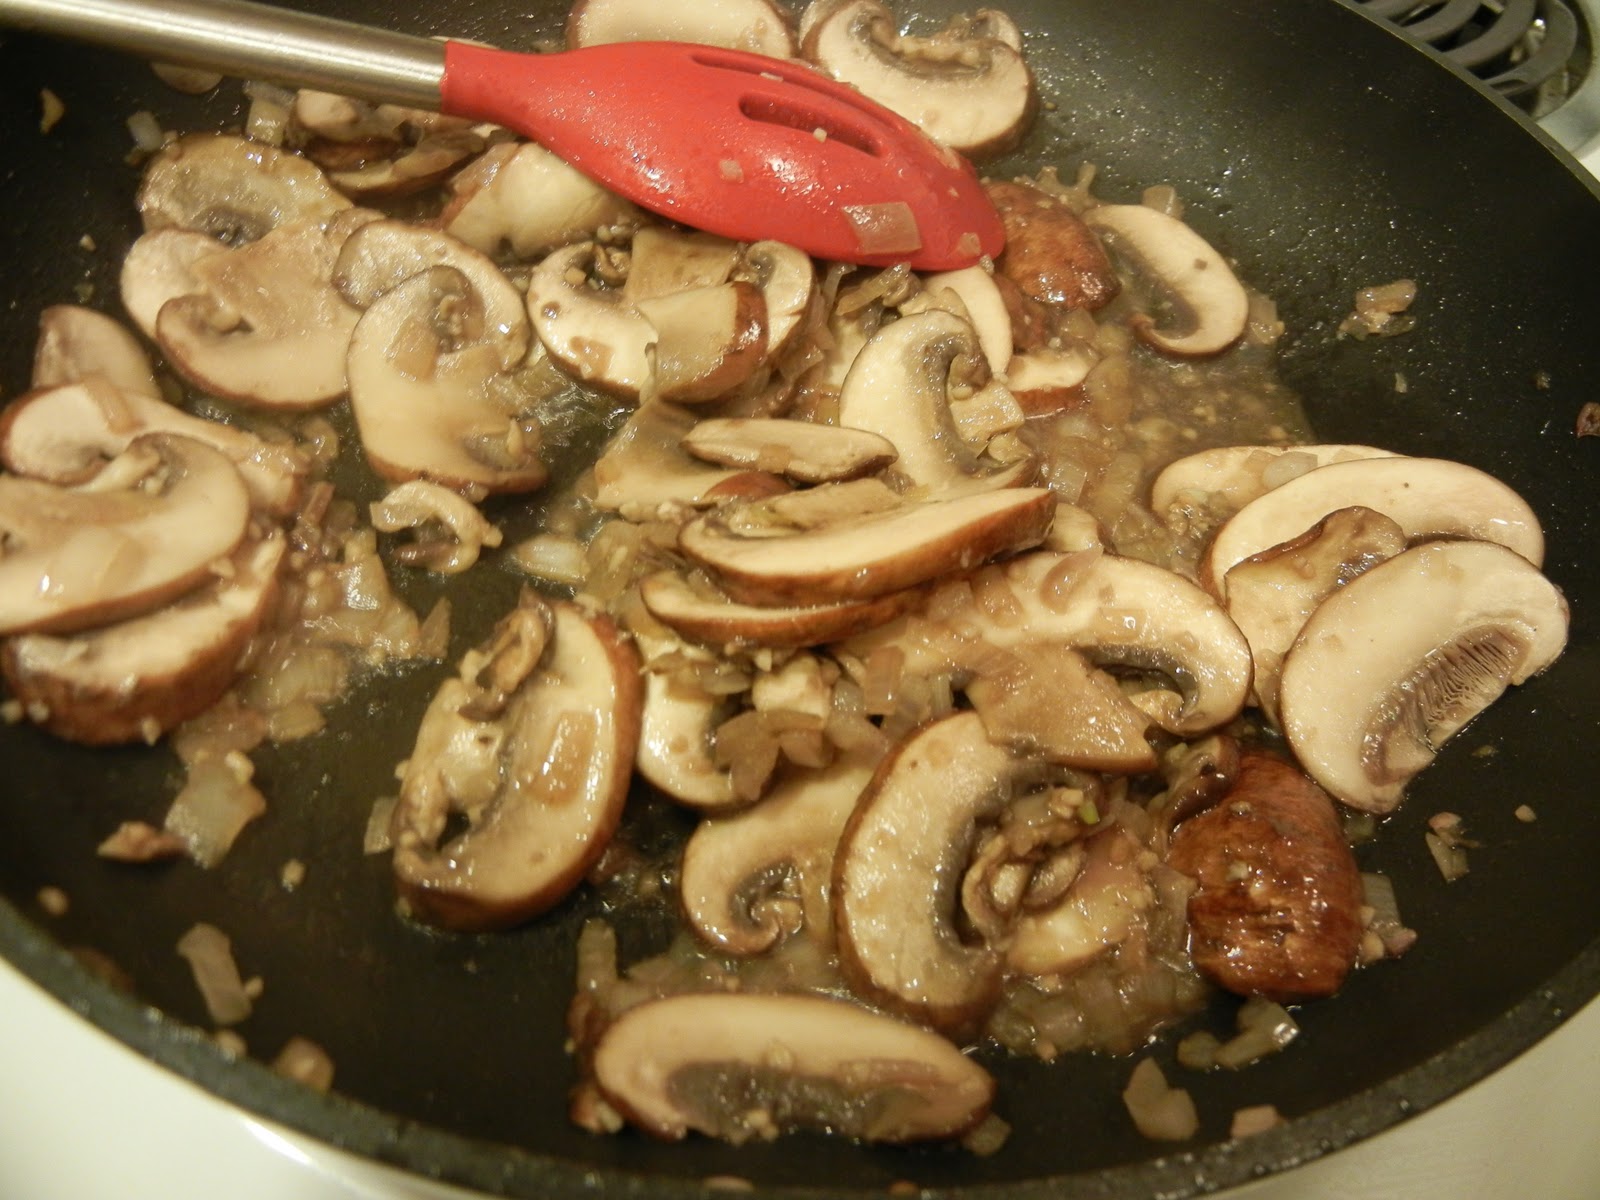
The ingredients... except for the tortillas. I forgot to photograph those.

Fresh out of the oven.

Look at all those layers of deliciousness. Yum!

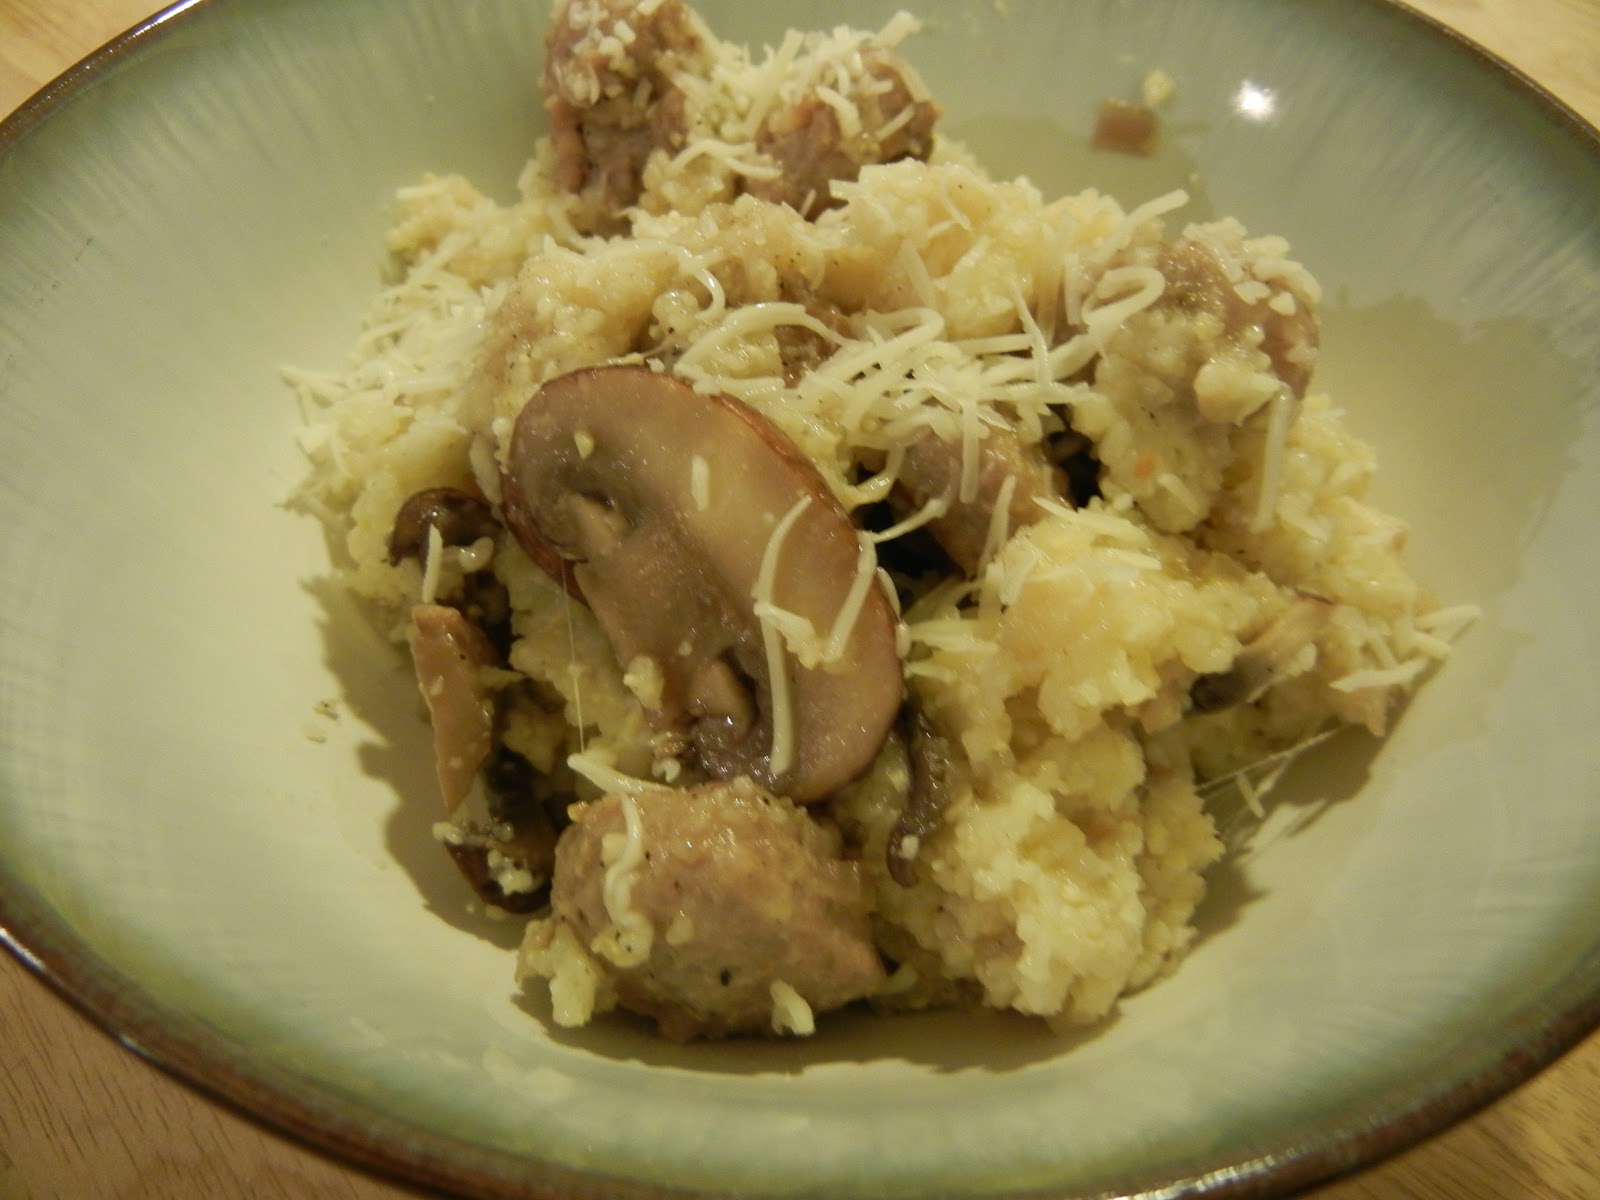
Final product - Santa Fe Chicken Casserole. Delicious!

Tips and Alterations:

  • Never heard of the Philadelphia Cooking Cream? It’s a fairly new product for Kraft, but can be found in the cold section of the grocery store right next to the regular and flavored cream cheeses. I’ve found it in every grocery store that I have visited thus far.
  • I forgot to buy green onions when I made this, so I used dried chives and cilantro instead. Still phenomenal.
  • Also, to make it a bit faster, I used two cans of cooked, diced chicken. Rotisserie chicken would also be good if you don’t have time to cook the chicken.
  • I sprinkled paprika and parsley on the top for a little extra kick and visual appeal.
  • Mix a little shredded sharp cheddar cheese in with the Mexican cheese blend for some extra zing.
  • You may need to bake a little longer then 20 minutes to get it very hot and bubbly. Mine took about 30 minutes to be fully hot throughout the whole dish.

I hope you all enjoy this dish as much as my husband and I did. Great for a quick meal when you’re in the mood for Mexican after a long day. And the leftovers are definitely good as well.

Bon appetit!

-GG

Baking Therapy: Cranberry Scones

For some odd reason, whenever I get stressed or upset about something, I tend to bake. Not cook, but bake. Generally, if Scott comes home and finds a lot of baked goods lying around and there’s no special occasion coming up, he knows to be extra sweet to me that day.

I can recall one instance in high school that I produced cookies, an apple pie, and a cake… all in the same day.

Aside from the extra pounds, this tendency usually has good (and tasty) results.

My homesick blues tend to come and go, and this morning they were in full swing. Instead of hopping in the car and making the 9-hour drive to see my parents in Vermont, I opted to make cranberry scones instead. I was pretty sure my boss wouldn’t be happy if I called out Monday morning because I was several states away.

I didn’t take a huge amount of photos, but to me baking looks pretty much the same unless you’re doing something fancy. Mix dry ingredients, mix wet ingredients, combine, bake. So here’s what I wound up with.

This recipe is once again from my trusty Better Homes & Gardens red plaid cookbook. If you don’t have one, I suggest you go out and get one. Also – I halved this recipe when I made it since we do NOT need 12 scones lying around this house. The ingredients below make a full dozen.

Cranberry Scones

Ingredients:

  • 2 1/2 cups all-purpose flour
  • 2 tbsp sugar
  • 1 tbsp baking powder
  • 1/4 tsp salt
  • 1/3 cup butter
  • 2 eggs, beaten
  • 3/4 cup whipping cream (I used fat free half’n’half for my stomach)
  • 1/2 cup dried cranberries (or Craisins)
  • whipping cream or milk
  • sugar (I used Domino’s raw sugar – the large granules don’t dissolve as much on top of the scones)

Directions:

  1. Preheat oven to 400 degrees. In a large bowl combine flour, the 2 tbsp sugar, the baking powder, and salt. Using a pastry blender, cut in butter until mixture resembles coarse crumbs. Make a well in center of the flour mixture; set mixture aside.
  2. In a medium bowl combine eggs, the 3/4 cup whipping cream, and dried cranberries. Add egg mixture all at once to flour mixture. Using a fork, stir just until moistened.
  3. Turn dough out onto a floured surface. Knead dough by folding and gently pressing it for 10 to 12 strokes or until dough is nearly smooth. Divide dough in half. Pat or lightly roll each dough half into a 6-inch circle. Cut each circle into six wedges.
  4. Place dough wedges 2 inches apart on an un-greased baking sheet. Brush wedges with whipping cream and sprinkle with additional sugar. Bake for 12 to 14 minutes or until golden. Remove scones from baking sheet; serve warm.

Mmm… fresh out of the oven.

And of course I went a little crazy with breakfast too, but oh man was it good. I wish I had time for breakfast like this every morning!

Overall – the scones only took like 15 or 20 minutes tops to assemble and get in the oven, and were just coming out by the time I got the eggs and bacon ready. Great for if you’ve got a couple of friends visiting for the weekend and you don’t want to make a huge breakfast casserole or pancakes.

Nothing like a little baking & breakfast therapy to make you feel better! (Not to mention Skype-ing with your parents & grandparents helps a bit too.)

Hope you all had a great weekend – and I know you’re going to love these scones so hurry up and make them and we can drool over them together!

Big Steak Salad

For those of you who don’t know, I have a small love affair with The Pioneer Woman (Ree Drummond). Real woman, real food, real life. I just adore her.

But aside from my love affair, I’ve been trying out some of her recipes At the urging of my lovely friend Suzanne who tried out the recipe first, I decided for this Thursday’s dinner feature to try out one of Ree’s personal favorite recipes: The Big Steak Salad.

In the words of Uncle Jesse on Full House….

Have mercy.

To whet your appetite, here’s a picture of Ree’s version.

In an effort for brevity, here’s the link to her post where she shared the recipe. Because the dressing/marinade is homemade, there are quite a few ingredients in it, and she has a printable version – yay!

Ree’s Steak Salad Recipe

Now that we’ve got that covered, here’s how I made my own version of this amazing (and man-approved) salad.

I absolutely love the way the dressing/marinade looks before it gets mixed up. So many delicious ingredients in all sorts of lovely layers. This gets whisked up, and half goes into a bag to marinate the meat while the other half goes into the refrigerator to use as dressing later.

I used this lovely hunk’o’beef, which I got on sale at our grocery store (no, I didn’t pay $9.17 for it). For curious minds, I just used a london broil, aka top round. It was 1.67 pounds, and which would be enough for probably 5 or 6 salads. We love leftovers!

Seal up the marinade and the beef in a gallon-size ziplock bag. I always set mine into a dish because I’m incredibly accident prone. If I were to just set the bag into the refrigerator, I would inevitably come home to a huge, leaking mess.

Once I got home, I decided to try my hand at the candied pecans. I chopped up the pecans with my lovely little chopper, which in hindsight, made them too fine – I’d recommend just getting Pecan Pieces so they’re fairly large but still bite-size. Then I spread them out into the pan.

So then I began the task of making the sugar coating. Which…did not turn out so well. Ree doesn’t give a whole lot of instruction and I think this is something a little more tricky. Mine seemed to be melting down just fine, and then I hit a moment where it suddenly turned into sand and I mildly freaked out. So I turned up the heat to medium-high and it finally melted down into the golden amber color she was talking about. Here’s how it went.

Once I finally got it to this stage, which definitely took a lot longer than five minutes – sorry Ree! – I poured it over the pecans. Which, I failed to note that Ree said you may not have to use all the sugar mixture. So I dumped it all on there. **Note: After the sand-scare, I was worried I had ruined my saucepan. However, clean-up is incredibly easy for this – I just soaked it in water for a few minutes and all the sealed-on, hard-as-a-rock sugar completely vanished. Hurrah!**

You can see that it’s more of a big glop than a nicely broken up mixture. Because it’s a glop, it hardened into this.

What’s the word for this…besides sheer-rock. Don’t they call something like this brickle? Brittle? Rock-candy? I don’t know. Either way, it was harder than molasses in January and I wasn’t feeling like attempting to break it all up into pieces. Sooo…being wasteful me, we didn’t have the candied pecans on our salads. I’m sure they’re delicious, but truth – the salad was awesome without it. And probably significantly healthier, since that sugar mixture is a CUP of sugar and a little bit of water.

So moving on. Without candied pecans. Sad day.

Also a sad day? This is what I have to use as a grill. THE GRIDDLERRR. (I always say it with a very dramatic tone of voice, because it makes it a little more exciting.) It technically has a top grill plate, but since I was only using the bottom I decided to have one less item to wash and not attach the top.

So I let my steak get nice and toasty. Since it’s a weenie little indoor grill, it took me more like 10 minutes per side to get to medium rare, not the 2 minutes that Ree talks about. But it always varies – so just cook your steak to your liking.

While it was grilling, I started assembling the salads. Ree makes her own fried onion strings, but since I have taken a solemn vow to never deep fry something in our home (I know, I’m missing out on a lot), and also because I was tired after work, I opted to just use French Fried Onions instead of making the onion strings by the recipe.

I’m a french fried onion snob and will only use brand-name, not generic. (I was not compensated in any form to say this!)

Toss up some salad, grape tomatoes, some cheese (we used shredded Italian blend, not Bleu), and the onions, and slice the steak up thin. And voila!

World’s most beautiful salad.

I hope you’re drooling. You’re not yet? Here’s a picture of TWO of the world’s most beautiful salads.

Let’s have a little “have mercy” again.

Have. Mercy.

Okay, I’m done now. You there! You! Go hurry off and make this salad! Your stomach will thank you.

And in case you don’t feel like looking for the link, here it is again. Because I’m generous. And you better remember it.

Ree’s Big Steak Salad

Happy Thursday!

My All-Time Favorite “Go-To” Recipe

I’m sure you all have recipes that are your “go-to” recipes. You know the directions by heart, and you make it at least once or twice a month. For this Thursday’s dinner feature, I thought I’d share mine.

This recipe comes from my trusty Better Homes & Gardens red plaid cookbook. I wish I had been clever enough to come up with it on my own, but alas. They got to it first!

Oven-Fried Pork Chops

Ingredients:

  • 4 pork loin chops, cut 3/4 inch thick
  • 2 tbsp butter, melted
  • 1 egg, beaten
  • 2 tbsp milk
  • 1/4 tsp black pepper
  • 1 cup herb-seasoned stuffing mix, finely crushed

Directions:

1. Trim fat from pork. Pour butter into a 13x9x2-inch baking pan, tilting pan to coat the bottom. In a shallow dish combine egg, milk, and pepper. Place stuffing mix in a second shallow dish. Dip chops into egg mixture. Coat both sides with stuffing mix. Place in prepared pan.

2. Bake, uncovered, in a 425 degree oven for 10 minutes. Turn chops. Bake 10 to 15 minutes more or until meat is 160 degrees and juice run clear.

Simple! Here’s how I do it.

I get my little assembly line set up, and get to work. As you can see, I didn’t “finely crush” my herb-seasoned stuffing mix. I prefer mine to be a bit…thicker. However, you don’t even have to use herb-seasoned stuffing mix. Since that’s not something I usually have lying around the house (although I did this time after that delicious French Onion Beef), I usually use bread crumbs and season it with whatever I want.

Dip, smother in crumbs, repeat. You’ll probably also notice by this point that I didn’t butter my pan. Call me crazy but it seems a little silly to trim the fat off your pork and then coat your pan in butter. So, I just save myself some time, leave that yummy fat on the pork, and skip the butter. I have non-stick pans (and a non-stick foil addiction) so the lack of butter isn’t an issue. I’ve tried it with the butter and it doesn’t really seem to add much flavor, in my humble opinion.

Usually whenever I’m done, I sprinkle the rest of the crumbs onto the chops. You can also see that I did 5 chops, because that’s what I had and I didn’t feel like having a random pork chop in the refrigerator. This recipe is flexible so you can just whip up a little more egg-mixture if you need it. I almost always have leftover mixture though.

Bake it…and voila! I served mine with steamed carrots sprinkled with italian seasoning (a current favorite in our house) and my ever-classic and oh-so-sophisticated…Rice-A-Roni. Easy meal!

These pork chops are a huge hit every time I make them, and they’re incredibly easy to put together.

Which would be why I make them. A lot. (Not that I think Scott minds.)

Hope you enjoy – Happy Thursday (and St. Patty’s Day!) everyone!

Crock-Pottery continues: French Onion Beef!

I seem to be on a crock-pot kick lately. It just seems to be the perfect thing, since I’ve been working long days and the last thing I feel like doing when I get home sometimes is cooking dinner. Today was a prime example of that.

So my latest crock-pot discovery out of my favorite Gooseberry Patch Slow-Cooker cookbook?

French Onion Beef.

And I can say without batting an eyelash that this is by far my most favorite creation that has EVER come out of the crock pot. By far. I’m pretty sure I almost keeled over and died after the first bite. Even better than the Beouf Bourgignon from a little while ago. (I KNOW. It’s almost a sacrilege.) And the best part? Ridiculously easy. Here we go.

French Onion Beef (contributed to Gooseberry Patch by Dawn Dodge from Roscommon, MI)

Ingredients:

  • 1-1/4 lbs boneless beef round steak, cut into 6 pieces (I highly recommend using more meat – we felt like it disappeared too quickly)
  • 8-oz pkg. sliced mushrooms
  • 1 cup onion, sliced and separated into rings
  • 10-3/4 oz. can French onion soup
  • 6-1/4 oz. pkg. herb-flavored stuffing mix
  • 1/4 cup butter, melted
  • 8-0z pkg. shredded mozzarella cheese

Directions:

Layer half of beef, mushrooms and onion in a slow cooker; repeat layers. Pour soup over top; cover and cook on low setting for 8 to 10 hours.

Shortly before serving, toss stuffing mix with its seasoning packet, melted butter and 1/2 cup liquid from slow cooker. Spread stuffing mixture on top of beef. Increase to high setting; cover and cook for 10 minutes, or until stuffing is fluffy. Sprinkle with cheese; cover and heat until cheese is melted. Serves 4 to 6.

It doesn’t look like much but WOAH. So, so good.

I served mine with Braided Cheese Bread, which is my friend Kristen from The Frugal Girl ‘s recipe. Absolutely delish (although mine looks a bit different from hers).

Tricks of the Trade:

  • I couldn’t find a 6 1/4 oz pkg. of the herb-flavored stuffing mix, so I bought a bigger bag and used the leftovers on my favorite pork chops that I’m going to share with you later on.
  • Like I said before, definitely use more meat. We felt like it sort of vanished.
  • I only used about 4 oz of cheese and it still felt like a ton. This dish is rich enough to use very little cheese.
  • Make sure your mushrooms are sliced thick so they don’t disintegrate after cooking for several hours.
  • Be warned. This dish DOES NOT re-heat well. For something that’s absolutely incredible the first time around, it pretty much turns into an icky mush pile the second time. So make it when you have a lot of mouths to feed.

Despite not re-heating well, this will definitely be made again in our house. It took about 10 minutes or less to assemble in the morning, and another 10 minutes to get the stuffing mixture together in the evening. I hope you all enjoy it as much as we did!

Happy Thursday, and happy Crock-Pottering!

Caramelized Sweet Onion Dip

Whew! I’ve emerged out of my migraine-induced coma that kept me home from work and lying in my dark bedroom all day yesterday and I feel back to my normal self today. Hurray! I think this calls for a celebration. Especially if that celebration involves sweet caramel-y onion-y goodness.

Now, if you’re anything like me, caramelized sweet onions are fairly close to heaven. Otherwise known as Vidalia or Walla Walla onions…sweet onions are a nice, mild variety that once caramelized or sautéed add a great flavor to most any dish, even sandwiches. So when I was searching through my new Skinny Dips cookbook that my mother-in-law gave me for Christmas and my eyes landed on this recipe, I was pretty sure I had struck gold.

Let’s break it down.

Ingredients:

  • 1 tbsp extra-virgin olive oil
  • 2 medium walla walla or other sweet onions (about 1 lb) finely chopped
  • 2 tsp kosher or sea salt
  • 1/4 tsp freshly ground pepper
  • 1 1/4 cups reduced-fat sour cream
  • 2 oz low-far cream cheese, bar style, at room temperature
  • 2 tsp white wine vinegar
  • 1/4 cup finely snipped fresh chives

Directions:

1. In a large nonstick frying pan over medium-low heat, warm the olive oil and swirl to coat the pan. Add the onions, salt, and pepper. Sauté the onions, stirring frequently, until tender and caramelized to a golden hue (but not browned), 25 to 30 minutes. (Turn the heat to low, if necessary.) Remove from the heat and let cool to room temperature.

2. In a medium bowl, combine the sour cream, cream cheese, and vinegar. Using a rubber spatula, fold in the onions and then gently fold in the chives. Taste and adjust the seasoning.

“Skinny Dippers” (Dipping Suggestions): baked potato chips, Crostini, Baked Bagel Chips, Roasted Fingerling Potatoes, Crudités (veggies), thin breadsticks

This dip can be prepared up to 2 days in advance. Cover and refrigerate. Remove from the refrigerator 45 minutes before serving.

YUM. Doesn’t that sound delicious? This is one of the random assortment of foods that Samantha and I served at our birthday party this year, and man oh man was it good! I personally think it would make a great spread on a sandwich or wrap too. I highly recommend this cookbook – I think it’s well laid out and gives clear instruction, great dipping recommendations, and a very clear calorie count and portion size. Not to mention it’s refreshing to get away from french onion dip and salsa. Two thumbs up!

Happy Tuesday my sweet friends!

Potato Wedgies

Or, I guess I mean Potato Wedges. Parmesan Potato Wedges, that is.

I know what you’re thinking – Thursday Dinner Feature? You can’t just eat potatoes! (Although I can almost guarantee you I could just eat these for dinner.) But all dinners need sides. Sometimes, one “special” side can dress up a plain vegetable and meat and make the whole thing come together.

I’ve been on a beef kick recently since I managed to catch a huge sale at our grocery store and now our freezer is stocked up with beefy goodness. So all I really wanted was a nice steak, some steamed broccoli, and a side.

Enter Parmesan Potato Wedges.

Parmesan Potato Wedges (Recipe from my trusty Better Homes & Gardens New Cook Book…you know…the one with the red plaid cover.)

Ingredients:

  • 6 medium baking potatoes (about 2 pounds – I used 4 red potatoes)
  • 1/3 cup butter, melted
  • 1 clove garlic, minced
  • 1/4 cup grated Parmesan cheese
  • 1/2 tsp Italian seasoning, crushed

Directions:

Line a 15x10x1-inch baking pan with parchment paper or foil; set aside. Cut each potato lengthwise into eight wedges. In a large bowl stir together butter, garlic, Parmesan cheese, Italian seasoning, 1/4 tsp salt, and 1/8 tsp black pepper. Add potato wedges and stir to thoroughly coat. Place the wedges on the prepared baking pan. Bake, uncovered, in a 425-degree oven about 30 minutes or until tender.

Gotta love beautiful potato wedges.

Crispy, cheesy  goodness.

And voila! A delicious, complete meal that I can pretty much guarantee your family will drool over.  This recipe is very simple, so there really aren’t any tricks of the trade to share. As far as my broccoli and steak go, I pan-fried the steak with salt and pepper, and steamed the broccoli until tender. Hope you enjoy!

Happy Thursday!

One Party Theme…Two Ways – Part One!

February is an odd month amongst my friends and I, because there are a very large quantity of birthdays crammed into that month. This might explain why I haven’t been posting as much lately, since I’ve been planning and making birthday packages and birthday party-ing all month.


My friend Lauren, a frequent guest blogger here on That’s Megs (now Little Stirrings…woop woop!), has yet another treat for us. Since her birthday was February 5th, and mine was February 21st, we decided to do the same birthday party theme, two different ways. She had her own party in North Carolina, and I had mine here in Maryland, and afterwards, we compared notes. Since she is a fantastic writer, here is the summary of her party, in her own words.

The Theme: Wine Tasting and Tapas Birthday Party

The Premise: I wanted to do something different for my birthday, something a little more grown up – because 25 is SUCH a distinguished birthday. I love few things in life more than hosting a good dinner party, so I wanted to do something similar without spending as much money to feed 12-15 people a full meal OR spending the whole day in the kitchen. (Update: Backfire on that goal. I spent more money than I meant to and spent most of my birthday day in the kitchen anyhow – with the help of my lovely husband and my friends Corey and Katelyn).


The Invitation: We asked each person or couple to bring a bottle of wine to share for the tasting – no limitations, and unless you have a very predictable group of friends, you’ll likely end up with a lot of different wines. I’d dare say we didn’t have any duplicates even on type (Malbec, Pinot Grigio, etc.). As guests arrived, we looked up the wines they brought and created little cards with information on each one, including flavors to notice, ideal pairings and trivia about the maker. We did this so everyone could taste at their own pace without sacrificing the education. 🙂

The Menu: I tried to stay relatively true to authentic Spanish tapas, but they eat a lot of mayo, people! And weird fish things. So I pulled in Mediterranean small plate dishes as well. All recipes are from Barnes & Noble’s Essential Cooking Series: Tapas cookbook unless otherwise noted. I’ve also included main ingredients when not totally obvious. Here’s what it came out to:
+ Greek chicken skewers [Inspired by my fave tapas restaurant: Soul, Charlotte, NC; Pampered Chef Greek rub from Megs and fresh lemon juice]
+ Shrimp skewers [Soul]
+ Chorizo in red wine
+ Asparagus wrapped in prosuitto
+ Sauteed green beans & pine nuts
+ Pita chips with hummus, tzatziki and white bean dip [insanely simple, delicious white bean dip recipe compliments of Giada de Laurentiis]
+ Sauteed mushrooms [Momma’s recipe; butter, EVOO, Italian herbs]
+ Brussle sprouts in truffle oil [Inspired by Table 6, Denver, CO; white truffle oil, fresh lemon juice and parmesan cheese]
+ Patatas bravas [Spanish classic; pan crispy potatos (rather than the traditional fried) with bravas sauce, which is mostly mayo, ketchup, paprika, annnnd stuff.]
+ Provolone and roasted red pepper crisps [Real Simple recipe; it’s little flatbread pizzas! Surprisingly wonderful]
+ Red velvet cupcakes [more birthday than Spanish, from one Betty Crocker]


Tips: I sometimes learn the hard way. So you don’t have to:
+ If you have a lot of stemless wine glasses, as we do, think of a way to distinguish between guests’ glasses (I’ve used ribbons and charms for stemmed glasses, but we had nothing for the stemless among us. Cor and Kate informed me that dry-erase markers work relatively well on those.)
+ Separate the wine tasting area and the food area. It keeps one area from being congested. We covered the table in food, and set the wines on the counter.
+ Prep EVERYTHING you can ahead of time. Identify which glasses and serving bowls you’ll use at least the day before.
+ Toothpicks. Invest in a bunch. And by invest, I mean that they’re $0.99 for 250 of them.
+ Tapas involve a TON of pots and pans, some of which have to be used right up until you’re ready to eat. Brilliant Joshua put all the dirty things in the oven and closed it up until post-party. (honesty: next day. Excessive red wine consumption hardly inspires dish washing at 2am). No mess out, but also no one washing dishes for the first hour of the party!
+ Once we’d all eaten and mingled for a while, we actually threw in a WILDLY entertaining game of Cranium. In the absence of a seated dinner, the game allowed us to keep tasting wines and hanging out as a big group. Highly recommend an activity if the night calls for some organized bonding.

+ Skewers on fire are a handy, if far-reaching, substitute for birthday candles. Who knew!

The Verdict: Two thumbs up! I loved it. I liked that it was different and easy to throw together. The atmosphere and set-up were condusive to lots of conversations between many friends who were meeting for the first time. Viva las tapas!

The fabulous Lauren & Josh, wife & husband extraordinaire.
Photobucket

Boof Bore-gihn-nyon.

Not just one, but TWO missed Thursday dinner features? What am I doing to you people! I’m a terrible friend I know. I have still been cooking, still been documenting, but my work life has been such lately that I’ve been going to bed or sitting dumbly on the couch shortly after arriving home. So, today will have to be the “Friday” dinner feature. I promise though…it will melt your knees straight into your toes.


This comes from my Gooseberry Patch Slow-Cooker Recipes cookbook, although I can tell you right now that even though it stays in the crock pot for 8 to 10 hours, you’re going to need at least an hour or two to get it prepped in the morning. This is a great Saturday or Sunday adventure…definitely not a weeknight adventure. For sure.


This recipe is a crock pot version of Julia Child’s infamous Boeuf Bourguignon that Scott has been begging me to make since seeing the movie Julie & Julia. And woah nelly. Just. Woah. Wait till you try it, you’ll understand, but first read the recipe and you’ll get a glimmer.


Company Beef Bourguignon


Ingredients:
3lbs boneless beef round steak, cubed (Julia Child recommends 2-inch cubes…mine were more like 1-inch)
6 slices bacon, crisply cooked and crumbled, drippings reserved
1 onion, sliced
1 cup baby carrots
salt and pepper to taste
3 tbsp all-purpose flour
10-1/2oz can beef broth
1 tbsp tomato paste
2 cloves garlic, minced
1/2 tsp dried thyme
1 bay leaf
16-oz pkg sliced mushrooms
1 tbsp oil
15-oz jar pearl onions, drained
1/2 cup Burgundy wine or beef broth (I used Marsala, for better or for worse)


Directions:
Brown beef cubes in reserved bacon drippings; place in a slow cooker. Add onion, carrots, salt and pepper to skillet; stir in flour. Add broth and tomato paste; mix well and pour over beef. Sprinkle bacon, garlic and herbs over beef. Cover and cook on low setting for 8 to 10 hours. One hour before serving, saute mushrooms in oil; add to slow cooker along with pearl onions and wine or broth. Discard bay leaf. Makes 4 to 6 servings.


Simple, right?


In case the magnitude of the “wooahhh nelly” of this recipe didn’t sink in to you, let’s break it down.


Exhibit A: HUGE hunk’o’beef. I finally made this recipe because our grocery store had all beef round 50% off….which was certainly good enough for me!

Cube it up.

Hello, bacon. Have I told you lately that I love you?

Crisp it up.

Alright, hold onto your socks, here’s where it gets greasy good. See all that liquid, that you’re browning the meat in? That would be bacon grease.

Julia Child recommended browning it in small batches, which worked out well since you have to rotate each piece a bit to get all sides browned. My little pattern was to get one batch going, then flip it, move it to the other side of the pan, then start the next batch, which produced beautiful beefy-multicolored pan.

For the whole pattern, I had a little system set up like this. I was putting the beef straight into the crock pot, and since it was a bit drippy, I just covered my burner/stovetop with wax paper to make for easy clean-up later. You don’t exactly want bacon/beef grease dripping onto your burners. Hmm.

I also didn’t crumble my bacon, because I was feeling lazy. Oh well.

So you finish up the beef. And believe it or not, there’s still more bacon grease left. But we can’t let it go to waste! So let’s saute the veggies in it. (Don’t deny it, your toes just curled a little.) This is right after adding the flour.

You can’t really tell from this photo, but by this point, the broth has thickened up quite nicely. Make sure you don’t cook your veggies to death, since this will be in the crock pot all day.

The whole ensemble in the crock pot, with the grease of six pieces of bacon, and, oh wait, six pieces of bacon. (Drool.)

I never pass up an opportunity to photograph sauteeing mushrooms. Yum.

Because I’ve been a loser the past few days, I may or may not have forgotten to photograph the final steps and the finished product the day we ate it. However, this is the next day when I ate leftovers. And truth: TEN TIMES better the next day. Whew.


Verdict:
A firm, resounding WOAH NELLY. If you need comfort food, this is pretty much the definition. And despite the prep time in the morning, clean-up was actually pretty easy.


A few tips:

  • Keep in mind your ingredients. Beef…bacon…broth…wine… We won’t go into too much detail, but I highly recommend taking some Pepto or some such thing before eating. For everyone’s safety.
  • The pearl onions were an awesome touch, but for me, way too strong after only cooking for an hour. Scott and Christian liked them, but I couldn’t eat them until the next day. I daresay I’d add them at the beginning of the cook time, or halfway through.
  • This recipe just screams for a nice little loaf of bread to sop up the juices. Too good to go to waste!
  • And if it wasn’t obvious enough, if you’re on a diet, stay FAR far away from this recipe. Yowsa.
And that’s that. If you haven’t gained five pounds just from reading this, I highly recommend making this as soon as possible. Especially if your weather is anything like ours today – cold and majorly rainy. Eesh.

Happy…Friday!

Photobucket

>Redneck Risotto

>I wanted to share this recipe with you as one of my, erm, less delicious attempts at cooking. I’m sharing it because I feel like it has potential, but there’s one key ingredient that was my stumbling block, and I feel like someone might be able to give me advice that would make this better?


What’s that ingredient?


Grits.


This may seem odd, since I was born in Georgia and raised in North Carolina…but we just didn’t eat grits in our house. I blame it on my parents being born and raised in Connecticut, so even though we lived in the South, we weren’t really genuine, sweet tea dripping out your veins Southerners. 


Here’s the recipe, from the 1998 Southern Living Annual Recipes cookbook. This particular recipe was contributed by Chef Jimmy Sneed in Richmond, Virginia. I apologize right now Jimmy for not doing justice to your recipe.


Redneck Risotto


Ingredients:
6 1/2 cups chicken broth, divided
2 cups uncooked stone-ground white grits
1/4 cup unsalted butter
2 (3.5 oz) packages shiitake mushrooms
3/4 pound spicy Italian sausage
2 garlic cloves, minced
2 shallots, peeled and diced
2 tbsp olive oil
1/2 tsp freshly ground pepper
3/4 cup freshly grated Parmesan cheese


Directions:
Bring 6 1/4 cups chicken broth to a boil in a large Dutch oven. Gradually add grits, stirring constantly; cover, reduce heat, and simmer, stirring occasionally, 1 hour or until creamy. Stir in butter; remove from heat.


Remove and discard mushroom stems; slice caps.


Remove sausage casings, and cube sausage; brown sausage in a skillet over medium-high heat, stirring often. Drain on paper towels. Wipe skillet clean.


Saute sliced mushrooms, garlic, and shallot in hot oil in skillet 1 minute. Add remaining 1/4 cup chicken broth; remove from heat.


Stir together grits, sausage, mushroom mixture, pepper, and 1/4 cup Parmesan cheese. Sprinkle with remaining 1/2 cup cheese. Yields 6 servings.


Sounds delicious right? I was so excited to try this recipe. Stupid, evil grits. Here’s my progress through the recipe.

This may have been my first mistake. The only options of grits I could find were these and instant. Hmm.
Peeling sausage casings isn’t for the faint of heart.

Now, if you know anything about grits, I’m assuming you can tell where I went wrong, right here. My grits weren’t creamy – they were actually quite stiff and moldable. I think I overcooked them? Someone help me out here.
I used Baby Bella mushrooms, since I couldn’t find Shiitakes.
Stirring the sausage into the grits.
This portion of the recipe smelled like heaven. I should have just left it out, mixed it with the sausage and had it over rice or something. Hmm…
Final product: doesn’t look so bad?

Since the flavors of the other ingredients smelled and tasted just fine, I’m 99.9% sure that my trouble was with the grits. I can imagine them smooth and creamy (like shrimp and grits…YUM), in which case this recipe would probably be one of my favorites. But since my grits were more similar to rubber than food, Scott and I wound up powering through this meal, and throwing away the precious leftovers, which I hate doing. 


So I’ve shared one of my failures with you, now would some precious Southerner explain to me the delicate art of cooking grits? Pretty please?


Happy Thursday!
Photobucket